
First, here is my finished card with the free digi, Cup of Posies, Faith created for this challenge. Isn't it a great digi image?!
 Next here is a close up of my home made chipboard photo corner.
 I decided to make some of my own chipboard embellishments, because lots of times I buy a set of chipboard embellishments just for one or two shapes, and the rest sit unused. This way I can make what I need, in which ever color I need, when I need it. So easy and convenient! And the best part I use something I always have on hand, light weight cardboard. Think empty cereal boxes, snack boxes and things like that. To make the most of the piece of cardboard I'm using, I cut a bunch of shapes at once. You can see here, I've used SU and Martha Stewart punches and PTI and Nestability dies to cut some shapes out.
 For the next step, coat your cardboard with a good sticky glue. I use Mod Podge and a paint brush to do this.
 Sprinkle glitter over the piece, shake excess off and let dry. After it is dry go back and repeat the glue and glitter, so it will be fully covered. Use the glitter over a tray like this or paper plate, so you can pour excess back into the bottle. There you have it, glittery chipboard in any shape and color!
 Thanks for stopping by today. I hope you will join us for this challenge on CDAC. And check out all the links below for some great tutorials to make all different sorts of embellishments.
**Make-Your-Own Embellishments Blog Extravaganza**
The Designed2Delight Lead Designers have been busy!! Follow all the links below to view 9 different tutorials for 9 different embellishments (on 8 different blogs) that YOU can make YOURSELF!!
 |
| Designed2Delight.com |
Don't forget to stop by the Designed2Delight Digital Stamps group on Crafter's Digital Art Center for the details AND a FREE Digital Stamp!!
 |
| Jane ~ Make Your Own Buttons Tutorial |
 |
| Lola ~ Make Your Own Felt and Fabric Flowers Tutorial |
 |
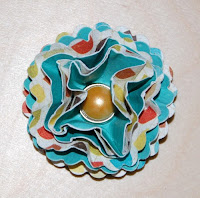
| Faith ~ Make Your Own Faux Prima Flowers Tutorial |
 |
| Kathy ~ Make Your Own Chipboard Accents Tutorial |
 |
| Debbie ~ Scalloped Punched Paper Flower Tutorial |
 |
| Robin ~ Stitching with Beads Tutorial |
 |
| Michelle ~ Scallop Punched Flower/Medallion Tutorial |
 |
| Michelle ~ Ribbon Frame Tutorial |
 |
| Sherrie ~ Make Your Own Ribbon Roses Tutorial |
16 comments:
This is really great Kathy! Makes me want to rummage through my punches and dies to see what I can make! Very inspiring!
Fun tutorial and I really love your card the bright cheery colors are perfect for a happy day! --Smiles from Robin :)
fun idea!! I need to remember this one too!!! I'm thinking homemade THICKERS with the Cuttlebug alphabet dies! COOL! :)
I rarely make my own embellies, yours are amazing! Great idea...your card is beautiful!
Fabulous tutorial! I like to use cereal boxes too (and love that they are FREE!). I never thought to use Modge Podge...I will have to try this!
Fabulous job Kathy!! I am LOVING this hop! You've all done a fabulous job sharing your tutorials. I can't wait to dig in and start making some of my own! And I just LOVE your coloring and how you popped up the flowers in the cup. This card is so bright and cheery--love it! *Ü*
Great idea! I knew there was a reason why I had a stack of empty Cheerios boxes laying around! Thanks for sharing!
Never thought of doing this- I love the idea of a glitter corner- too cool! Great card- love the colors you used and I love the digi! TFS
Great idea Kathy ! I like to make my own felt Flowers or paper flowers. These tutorials are great, thanks for sharing !!
WOW Kathy, awesome tutorial. Loved your card as well. Beautiful color combo.
This is SO great!!! I do the same thing with chipboard shapes--have so many I'm not using that I stoped buying "sets" of them. LOVE this ideas!! Your card is AMAZING, too! Really love the colors!
Really great tutorial Kathy. I love to make things with chip board but didn't know that the punches would cut it. Good to know!!! Your card is so cute. Thanks for sharing.
Hugs
This is so pretty. Love the polka dot ribbon its a great touch on here and those blinged out photo corners are the best.
Pretty card and thanks so much for sharing the tutorial
Great tutorial!! I love your green sparkley corners!!!!
Thank you for this tutorial.
Post a Comment